Saturday, November 10, 2012

Getting the itch to stitch

I've been itching to make a simple slouchy hat for awhile, and now that the temps outside have chilled, it's time!  The problem is that I hadn't really found one that I like. I want a hat that fits my criteria:
  • it must be super simple
  • it must be quick to make
  • it mustn't take skeins & skeins of yarn
  • it must be SUPER cute!
While browsing online this morning, I stumbled across a cute blog named,  Gleeful Things, which had a slouchy that appears to fit all my criteria. 

Better yet, the pattern is FREE!  Yay me! :)  While I plan to start writing some of my own patterns soon, this cute slouchy fits the bill perfectly for now.  Head on over there and show Julie some love!  She has many adorable patterns and her prices are very reasonable! 

I'll be making this tonight! :)


Thursday, November 8, 2012

Puppies!

Yeah cool!  Blogger is now allowing pages to be added so I don't have to move all this over to Wordpress. Yay!  Not that there's anything wrong with WordPress - there isn't.  I simply wasn't looking forward to moving all the content and energy to another site.  I've put a great deal of time and effort into Fred's, and was bummed when I discovered (after the fact) that everything posted on the ONE home page!  Yes, yes, I know I didn't do all my research beforehand...boo me.  3D life and work took over after that and everything online pretty much froze.

So, here we go and I'll be adding a whole lotta new content as well as a bunch of new products over the next few weeks!  Mainly doggie stuff, but some other fun stuff as well!

Take a look at what's been keeping us busy over the last few weeks:


                                                   Jenni


                                         Uno


                                          Jack, Jill, and Jenni


                                         Jack, Lily, and Jill


                                         Jenni


                                          Jill, Lily, and Jack


                                          a good mama, Lauren


                                          Jack


                                         Sam, Jack, and Jill


                                         Swirl


                                         Swirl
           

                                         Jenni


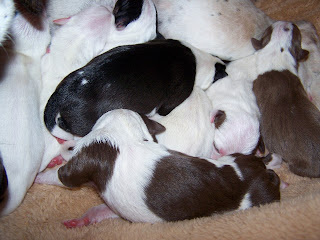
Eight precious new lives in a variety of colors from an emaciated, stray German shorthaired pointer my son picked up from a country road.  Thank God he found her in time for her to be cared for and gain some weight before her pups were born. All 8 babies lived, 4 girls and 4 boys, and all are healthy.

Here is mama Lauren when he found her:

So skinny, she was all bones and starving to death.

Here is mama Lauren afterwards, but before her pups were born:

A sweet, beautiful dog she is!  How could ANYONE throw this loving dog away?!

Here is a very pregnant mama Lauren:


Look at that happy girl!!!  She's so precious!


But in desperate need of a dentist! haha!  Now that she's finished weaning her pups, getting her teeth cleaned is the next order of business.

Here are her pups now, getting ready to be adopted to good homes!  We are very carefully screening folks who will be taking them when the time comes and each pup will have it's shots and worming treatments before they leave us.

                                                    Jack (white/black) & Sam


                                                    Uno


                                                    Swirl (top) & Jenni


                                                    Jenni


                                          Sam


                                                    Swirl


                                                    Jenni, Lily, and Sam


                                                    Swirl


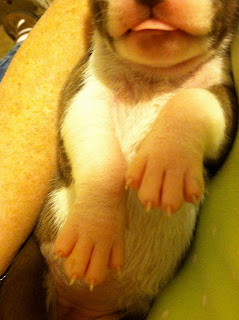
Aren't they adorable?!  Yes, their eyes and ears are open and have been for about 2 weeks.  They are 5 weeks old and mama has already weaned them. I have more up-to-date pics on my camera which I will add later.  If you think they're adorable here, you should see them now.  Rambunctious little critters!  Their names are Swirl (the girl shown immediately above), Jenni, Lily, Jill, Jack, Sam, Uno (the first born and he has a large dot on the top of his head), and Dexter. We're quite sure these pups have at least two daddies because they have some very distinct differences.  :)

So now, I leave you with health, happiness, and puppy paws...


Monday, July 30, 2012

Oy...I've neglected this blog for too long.  So much has been going on and not a whole lot of it good!  Two surgeries and one more scheduled for October, stray dogs, job hunting, mega home repairs, home refinancing (yay!), and yet more mega home repair fun planned, loved ones passing, and gardening 101.  The changes planned for the blog have yet to surface (obviously!).  Patience, dear friends, patience...The ball has started rolling!

Please stay tuned! :)


Friday, June 22, 2012

Blog, blog, blog

3 guesses as to why I have been away from the blog for so long....


Carpal tunnel release surgery today...more reconstruction surgery coming up Monday.  On that note, I'm planning to do an overhaul on the blog with some serious, yet exciting changes coming so stay tuned!!!

saluu,


Tuesday, April 10, 2012

Cute Little Owls :)

Don't you just love owls?  They are all the rage these days just like they were in the 1970's.  And it's no wonder because they are fascinating animals.

The other day I stumbled across the cutest crochet owl pillow patterns and I just had to have them!  This lady does phenomenal work and has a great eye for color.  I'm not really interested in making pillows with the patterns,  however.  I'm thinking more along the lines of cute purses, bags, or backpacks.  As a matter of fact, I'm in the process of making a little owlie for the cutest little girl!  I haven't decided whether or not I'm making this into a girly bag or maybe into a little backpack.  I'm following the pattern as written and will let the finished size dictate what this little owl will ultimately turn into.

As you can see in the photo below, I've almost completed the front side of the owl.  Sorry for the lousy photo!  The colors are actually MUCH brighter than the picture shows.  I will take better photos when the item is finished:


Do you get the idea? :)  This will make a rockin' bag or backpack!  I may even make some coordinating shoes to go with it (the jury's still out on that one!).  It's been a quick and fun project though honestly, the pattern has been a little difficult to read.  Before I make any more of these, I will most likely rewrite the pattern a bit and make some adjustments.  I'm assuming English is not the first language of the gal who wrote it, but CUDOS to her for the beautiful patterns she has created!  Plus, she allows you to sell things created with her patterns as long as you credit her for the design.  How cool is that?!?  Stay tuned!  More to come on this soon!

saluu,


Growing Tons of 'Taters in 10 Easy Steps!

It's only April 7th, but the garden is getting into full swing. (Excuse #5 for my most recent absence from the blog)  All the potatoes are in the ground and finally peaking their little heads out of the soil.  I'm trying something different this year with a few of my purple potatoes - growing them large, black new garbage cans on the patio.  I can't remember where I got the idea from, but it's super easy to do!  I bought seed potatoes this year from Big Lots and Lowes...and used some sprouting Russet ones we had here. :)  (And for those who are wondering, this site is in no way affiliated with Big Lots or Lowes.) Last year growing potatoes in our 1st-year-tilled-red-clay-yard-crappy-soil-garden was a bust.  This year we've added several soil amendments and it's looking much more promising.  This season we are trying several different types of potatoes to see how we like them.  We are growing the Adirondack Blue Potato, Russet Burbank Potato, Yukon Gold Potato, Red Norland Potato, and again, whatever Russet kind we had that was sprouting in the pantry.  Eh, why not? ;)

So here's how we did it:

Step 1: Obtain seed potatoes and cut the potatoes into chunks (pieces), with at least one "eye" on each chunk (piece). Allow these pieces to dry for about 24 hrs to help reduce the chances of them rotting when you plant them.

Step 2: Obtain large, black (or dark) garbage cans. We bought new ones
from the dollar store.  If you already have garbage cans, you know what they've been used for previously, and you've cleaned and sterilized them well, then I suppose you could use them if you wish.  I believe I read somewhere that you can also use those galvanized metal cans, but research that to make sure it's safe before you do it.  Really, you can use any large, plastic container as long as it's food safe and can be thoroughly cleaned and sanitized.  Potatoes do grow in DIRT after all.. We're using 3 new large, black plastic garbage cans.


Step 3: Drill several good-sized holes in the bottoms of your containers.

Step 4: Potatoes like their soil slightly acidic so mixing the soil with some leaf compost or a small amount of pine straw should take care of that.  I've grown them in the ground without either of these amendments before and they've done just fine.  So, add about 6 inches or so of a good, friable soil to the cans.

Step 5: Take your cut seed potatoes and add 2 or 3 of the potato eye pieces with the eye or sprout facing upright to the top of the soil,  spacing them about 12 inches apart.  Just eyeball it if you have to, keeping the potato pieces as far apart as you can to give them all room to grow in this space.

Step 6: Now add about 4 to 6 inches of good soil into the container,  making sure you cover the potatoes well.

Step 7: Place the garbage cans or whatever container you're using up on 
blocks, bricks, wood, or whatever you have to keep the containers off the ground for good drainage.


Step 8: Water your potatoes enough to get the soil damp throughout, but not enough to leave them sitting in soggy soil.  Your soil drainage should be such that most of the water will drain out the bottom leaving the soil moist, but not soggy.

Step 9: Sit and watch them grow!  Seriously folks, this is akin to waiting for water to boil.  Give it about a week or so and before long, you'll see the sprouts peeking through the surface of the soil. When the sprouts grow to about 6 inches over the soil, cover them with good soil again leaving a couple of inches of the plant uncovered. Water periodically and lightly fertilize occasionally (I use diluted fish emulsion), but again, do not water so much or so often that the plants are sitting in wet, soggy soil for long periods.  Repeat this process until your plants start flowering.


Step 10: Once your potato plants flower, do not water any more.  Move the containers to a place where the plants will dry and wilt and soil will dry out, and allow your potatoes to "cure" for a few weeks to enable them to store longer after harvesting.  After this, harvest and enjoy!


Edit:  Unfortunately this method was an epic fail this year.  This works great in a warm, DRY climate, but here in 'Bama...not so much.  Even with the "drought" it has just been too wet here for this method.  I was able to grow a few potatoes out in the garden, but even most of those simply would. not. grow.  The plants grew to about 6 inches tall and just stopped.  I'm also hearing much the same from other gardeners in the area as well.  Well, there's always next year!  (hopefully...) :)
Wednesday, March 21, 2012

Peanut Butter Rice Krispie Treats...a different kind of birthday cake!

Today is Honeyman's birthday so what better excuse is there for making these yummy treats?!  My husband is a HUGE fan of peanut butter and loves just about any food made with it.  Whenever these treats are made for the Relay for Life bake sale, he usually buys all they have.  He loves peanut butter sooo much that a good portion of his daily food intake consists of something containing...you guessed it...peanut butter!

There are probably thirty gazillion Peanut butter Rice Krispie Treat recipes on the internet, so if this is similar to anyone else's recipe, my apologies!  This is a recipe my husband and I came up with some time ago and have played around with it to get just the right peanut butter-marshmellow flavor he enjoys.  I personally prefer these made with crunchy peanut butter, but Honeyman prefers the smooth version.  If you make these yourself, please leave me a comment letting me know what you think!  These are super easy to make and one that kids can help with! Enjoy!


Peanut Butter Rice Krispie Treats


  • 1 1/2 cups (around 12 oz.) crunchy or smooth peanut butter
  • 2 regular bags tiny marshmallows (some folks prefer marshmallow creme instead, but I prefer using the actual marshmallows)
  • 1/2 stick of butter (do not substitute margarine)
  • 6 cups Rice Krispies (some prefer chocolate Rice Krispies instead of plain)
  • 9x13 inch rectangular glass, ceramic, or metal pan sprayed lightly with  non-stick cooking spray or greased with butter (I've found that cooking spray works the best)
  • optional ingredients:  add up to 2 of these with the Rice Krispies depending on your taste - chocolate chip morsels; coconut; peanut butter tiny morsels; chopped walnuts; M&M's
Use a large skillet and melt butter over low to medium heat until melted.  Add all the marshmallows to the butter and stir constantly until completely melted, being careful not to burn the marshmallows.  Unless you're using a non-stick skillet, some marshmallow mixture will inevitably stick to the bottom of the pan and darken.  Remove from heat and add all the peanut butter to the butter/marshmallow mixture and stir until well mixed.  Measure out Rice Krispies into a large bowl and pour marshmallow mixture over the Rice Krispies.  Fold mixture together quickly until well combined being careful not to mash the Rice Krispies too much in the process.  Transfer mixture to prepared glass, ceramic, or metal pan and pat into place to fill entire pan. Cover and transfer to refrigerator until chilled. Cut into squares and enjoy!


Tuesday, March 20, 2012

I'm not sure why everything is gone from the "home" page, but I'll look into it tomorrow.  Check back tomorrow evening for a couple of great recipes!

saluu,


Monday, March 19, 2012

Spring has sprung!

The time has finally arrived to get those seeds started for the Spring crop of veggies! This just so happens to be my favorite time of year with the arrival of crocus & daffodils nudging out the cold. When we were living in South Dakota, the crocus were always the first to peek through the late winter snow reassuring us that Spring had arrived!


Here in Alabama this year, I think we had 2 full days of chilly weather and that was it! Though skipping most of winter is nice, it unfortunately means we're probably going to have an active tornado season. Nearly a year ago on April 27th, 2011, several states, including Alabama, were hit hard with a series deadly tornadoes. That day hoping (& praying!) that we would be safe from the storms, my son, the Fred's, and I spent that day holed up in the hallway of our home. We were fortunate and escaped harm, but sadly many folks did not. Still nearly a year later, many areas here remain devastated and look just as they did when the tornadoes hit.

Now our new year has begun with renewed hope that this year will be better than the last. Folks are recovering and rebuilding their lives one day at a time. Difficult lessons were learned as ~many~ of us realized just how unprepared and vulnerable we were. For many folks, this new year is all about preparedness and regaining control of their lives. A renewed movement toward sustainability and self-reliance has taken hold and folks are running with it! I know that for our small family we are researching, learning, and moving forward.

This last month, I've been pouring through seed catalogs and making a list of all the seed & plants we need to get started. I found a great deal at Lowes on some nice, STURDY grapes vines. I can't wait to get them in the ground! :) This year I've also decided to try something different by planting a couple of Paw Paw trees and a Chocolate Vine! I mean, what could possibly be better than a CHOCOLATE VINE for crying out loud!?! haha...There's a couple "new" veggies I'm itching to try too. Purple potatoes seem to be all the rage this year and of course, this chickie is going to have to try these. Artichokes are new on the list too...LOVE them! Honestly, I'm not real sure how I'm going to feel about eating a purple potato, and I seriously doubt the boys will touch them with a ten foot pole. We shall see... :)
This year, instead of buying those aggravating little peat pots to start seed in, I'm making little newspaper pots. I borrowed the idea from here. These little guys are a cinch to make and work great!


Honeyman tilled the garden while I was at mom's today (thanks babe!) so I believe it's time for me to get cracking!


saluu,